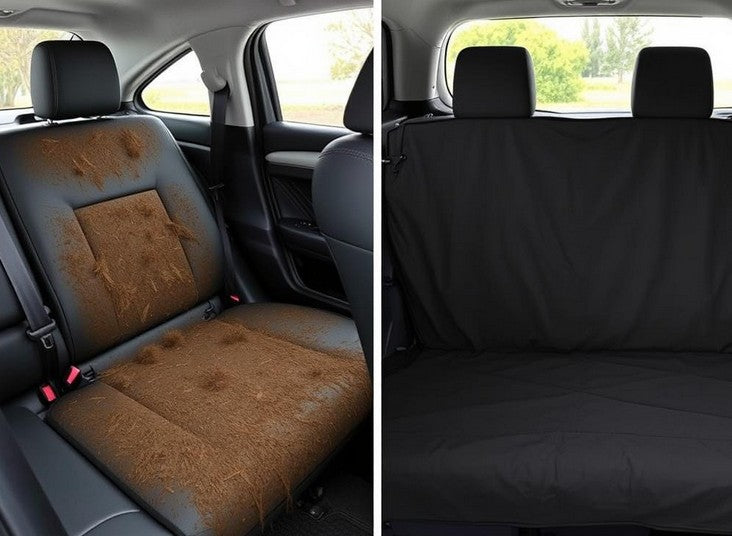
Waterproof seat covers are an excellent investment for protecting your vehicle's interior from spills, pet hair, dirt, and everyday wear. Whether you're an outdoor enthusiast, have young children, or simply want to preserve your car's resale value, properly installed and maintained waterproof seat covers can significantly extend the life of your vehicle's upholstery. This comprehensive guide will walk you through the installation process and provide essential maintenance tips to ensure your covers look great and perform effectively for years to come.

Benefits of Waterproof Seat Covers

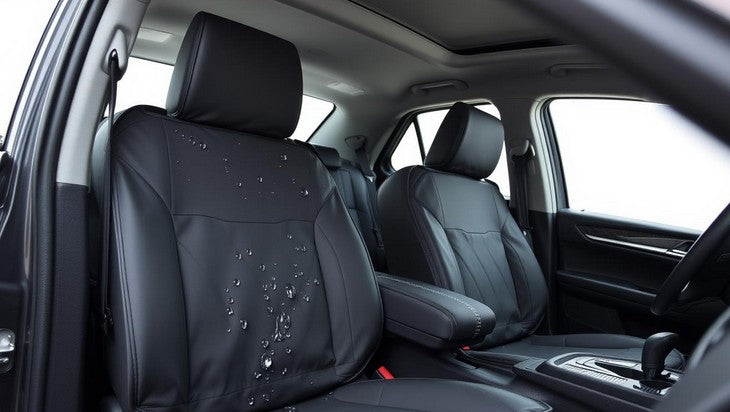
Investing in high-quality waterproof seat covers offers multiple advantages beyond basic protection. These specialized covers create a reliable barrier against liquids, preventing moisture from seeping into your vehicle's upholstery and potentially causing mold or mildew issues. They're particularly valuable for active lifestyles, providing peace of mind when returning to your vehicle after swimming, hiking in rainy conditions, or working up a sweat.
Beyond water resistance, these covers offer exceptional durability against daily wear and tear. The reinforced materials stand up to frequent entry and exit, protecting against friction that typically wears down factory upholstery. Many waterproof options also provide UV protection, preventing sun damage and fading that can diminish your interior's appearance over time.
Protect Your Vehicle's Interior Today
Find the perfect waterproof seat covers custom-fitted for your specific vehicle model.
Tools and Materials Needed

Before beginning the installation process, gather all necessary tools and materials to ensure a smooth experience. Having everything prepared will help you avoid interruptions during installation.
- Your waterproof seat covers (ensure they match your vehicle's make and model)
- Microfiber cloth for cleaning seats before installation
- Trim removal tool (for accessing seat anchors if necessary)
- Scissors (for minor adjustments if needed)
- Measuring tape (to verify dimensions)
- Installation instructions (specific to your seat cover model)
- Spray bottle with water (for smoothing out wrinkles)
- Small vacuum cleaner (for pre-installation cleaning)
Installation Steps for Waterproof Seat Covers
1. Prepping Your Seats

Proper preparation is crucial for achieving the best fit and appearance of your waterproof seat covers. Start by thoroughly vacuuming your seats to remove all dust, crumbs, and debris. Pay special attention to the crevices where the seat back meets the cushion, as dirt tends to accumulate there. Next, wipe down all surfaces with a damp microfiber cloth to remove any residual dust or stains. Allow the seats to dry completely before proceeding with installation.
Pro Tip: Remove any items from seat pockets and under the seats before beginning. This provides better access and ensures nothing gets trapped beneath your new covers.
2. Identifying Seat Components

Before installation, familiarize yourself with all components of your waterproof seat covers. Most sets include separate pieces for the seat bottom, backrest, and headrests. Some may also include additional pieces for armrests, console covers, or map pockets. Identify each component and match it to the corresponding part of your seat. This prevents confusion during installation and ensures each piece is positioned correctly.
3. Installing Headrest Covers

Begin with the headrests, as they're typically the easiest components to cover. If your vehicle has removable headrests, it's often easier to remove them first. Slip the cover over the headrest, ensuring it's centered and aligned properly. Smooth out any wrinkles and secure any straps or fasteners according to the manufacturer's instructions. If your headrests aren't removable, you'll need to work the cover over them while they're attached to the seat.
4. Applying Seat Bottom Covers

Next, install the seat bottom covers. Position the cover over the seat cushion, aligning any seams or patterns with the edges of your seat. Tuck the front portion of the cover under the front edge of the seat cushion. Pull the rear portion of the cover down between the seat back and cushion. If your covers include straps or hooks, secure them underneath the seat according to the instructions. Ensure the cover is pulled taut to prevent wrinkles or shifting during use.
5. Securing Backrest Covers

For the backrest covers, start by positioning the cover at the top of the seat back. Gradually work the material downward, ensuring it remains centered and aligned. If your seat has side airbags, make sure to align any specially designed seams or perforations with the airbag location. Pull the bottom of the cover down and tuck it firmly between the seat back and cushion. Connect any straps or hooks to the corresponding attachments on the seat bottom cover.
Important: If your seats have side airbags, only use seat covers specifically designed to accommodate them. Improper covers can interfere with airbag deployment in an accident.
6. Securing Straps and Anchors

Most waterproof seat covers include straps, elastic cords, or hooks to secure them in place. These attachments are crucial for maintaining proper fit and preventing the covers from shifting during use. Reach under the seat to connect any straps or hooks according to the manufacturer's instructions. Some covers may include S-hooks that attach to the seat frame, while others use elastic bands that stretch around the entire seat. Ensure all fasteners are secure but not overtightened, as excessive tension can damage the covers or make them difficult to adjust.
7. Final Adjustments

After all components are installed, make final adjustments to ensure optimal fit and appearance. Smooth out any wrinkles or bunching in the material. Check that all seams are properly aligned with the contours of your seats. Verify that seat functions like reclining, sliding, and folding operate normally with the covers installed. Make any necessary adjustments to straps or positioning to improve fit. For a professional-looking installation, take your time with this step to achieve the smoothest, most tailored appearance possible.
|
Installation Method |
Advantages |
Best For |
|
Hand-Tucking |
No tools required, adjustable fit |
Simple seat designs, temporary installations |
|
Hook-and-Loop Fasteners |
Secure fit, easy to remove for cleaning |
Frequent removal, multiple vehicle users |
|
Elastic Straps |
Accommodates seat movement, universal fit |
Adjustable seats, various seat shapes |
|
S-Hooks and Clips |
Most secure attachment, prevents shifting |
Permanent installations, high-use vehicles |
Need Help With Installation?
Our premium waterproof seat covers come with detailed installation guides and customer support.
Maintenance of Waterproof Seat Covers

Proper maintenance ensures your waterproof seat covers remain effective and attractive for years to come. Regular cleaning prevents dirt buildup that can wear down the material over time, while proper care techniques preserve the waterproof properties that make these covers so valuable.
Regular Cleaning Methods
Machine-Washable Covers
Many waterproof seat covers are machine washable, offering convenient cleaning. Always check the manufacturer's instructions before washing. Typically, you'll want to use cold water and a gentle cycle with mild detergent. Avoid fabric softeners, which can degrade waterproof coatings. Air dry the covers completely before reinstallation, as high heat from dryers can damage waterproof membranes and cause shrinkage.
Wipe-Down Materials
For covers that aren't machine washable, regular wipe-downs with appropriate cleaners will maintain their appearance. Use a damp microfiber cloth with mild soap for routine cleaning. For tougher stains, use cleaners specifically recommended for your cover material. Neoprene and vinyl covers typically respond well to specialized vinyl cleaners, while fabric-based waterproof covers may require different solutions.
Cleaning Frequency Recommendations
- Weekly: Quick wipe-down with a damp cloth to remove surface dust and minor spills
- Monthly: More thorough cleaning with appropriate cleaner for your specific material
- Quarterly: Deep cleaning (machine wash if applicable) or complete removal for detailed cleaning
- Immediately: Clean any significant spills or stains as soon as possible to prevent setting
- Seasonally: Inspect for wear and perform maintenance before extreme weather seasons
Maintenance Warnings
To preserve your waterproof seat covers, avoid these common mistakes:
- Avoid Bleach: Harsh chemicals can break down waterproof coatings and damage fabric
- Don't Use Abrasive Brushes: Scratchy materials can wear through protective layers
- Skip the High Heat: Hot dryers and direct sunlight can warp and damage covers
- No Petroleum-Based Cleaners: These can dissolve adhesives and waterproof treatments
- Avoid Pressure Washers: High-pressure water can force moisture into seams
Extending Cover Lifespan

To maximize the lifespan of your waterproof seat covers, implement these preventative maintenance practices. Avoid sharp objects that could puncture the waterproof membrane. Apply UV protectant to covers exposed to significant sunlight. Periodically check and retighten straps and fasteners that may loosen with use. Address small tears or damage immediately before they expand. For vehicles stored outdoors, consider additional protection during extreme weather conditions.
"The difference between waterproof seat covers that last six months versus six years often comes down to proper maintenance. Regular cleaning and appropriate care preserve both appearance and functionality."
- Automotive Interior Specialist
Troubleshooting Common Issues
How do I fix wrinkles and bunching?
Wrinkles typically indicate the cover isn't pulled tight enough. Remove the cover and reinstall, ensuring all straps are properly secured and the material is pulled taut across the seat. For stubborn wrinkles, a light misting with water can help the material relax and conform to the seat shape as it dries.
What if my seat covers keep sliding out of position?
Sliding usually results from insufficient anchoring. Check that all straps, hooks, or fasteners are securely attached to appropriate anchor points. If your covers use elastic bands, they may have stretched over time and need replacement. For a temporary fix, non-slip shelf liner placed between the seat and cover can provide additional grip.
How can I address small tears or damage?
Small tears should be repaired immediately to prevent expansion. For neoprene or similar materials, waterproof repair patches (similar to those used for wetsuits) work well. Vinyl covers can be repaired with vinyl repair kits. Fabric-based waterproof covers might require sewing and waterproof seam sealer. Always clean and dry the area thoroughly before attempting repairs.
What if my covers no longer repel water effectively?
Waterproof coatings can degrade over time, especially with frequent cleaning or exposure to harsh conditions. Many waterproof fabrics can be retreated with aftermarket waterproofing sprays designed for automotive fabrics. Follow product instructions carefully, ensuring complete coverage and adequate drying time before using the seats.
Conclusion

Properly installed and maintained waterproof seat covers represent one of the smartest investments you can make for your vehicle's interior. They provide essential protection against spills, stains, UV damage, and everyday wear while preserving your upholstery's condition and your vehicle's resale value. By following the installation steps outlined in this guide and implementing regular maintenance practices, you'll ensure your covers perform effectively for years to come.
Remember that quality matters when it comes to waterproof protection. Premium covers with proper fitment not only look better but also provide superior protection and durability. The time invested in careful installation and regular maintenance pays dividends through extended product life and better protection for your vehicle's interior.
Protect Your Vehicle's Interior Today
Shop our premium selection of custom-fitted waterproof seat covers designed specifically for your vehicle make and model.

Leave a comment
This site is protected by hCaptcha and the hCaptcha Privacy Policy and Terms of Service apply.