When it comes to car batteries, knowing which cable is positive and which is negative isn't just about getting your car started—it's about safety. The quick answer: red cables connect to the positive terminal, while black cables connect to the negative terminal. This color-coding system is standard across the automotive industry, but understanding why this matters and how to verify it could save you from dangerous mistakes and potential damage to your vehicle's electrical system.
In this guide, we'll explore everything you need to know about battery cable identification, proper connection techniques, and what happens when things go wrong. Whether you're jump-starting a dead battery, installing a new one, or simply want to understand your vehicle better, this information is essential for every driver.
The Universal Color-Coding System for Battery Cables
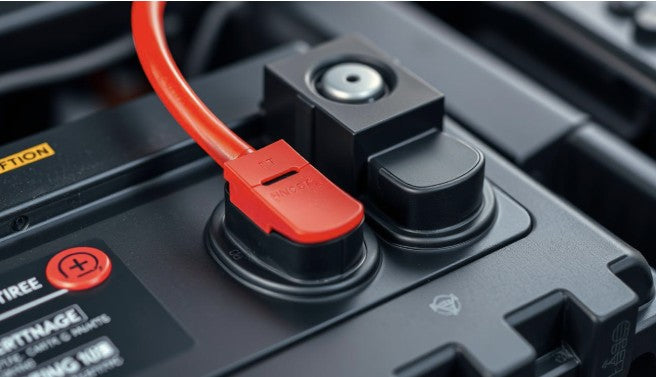
Standard color-coding: Red cable on positive terminal, black cable on negative terminal
The automotive industry follows a standardized color-coding system for battery cables that has been in place for decades. This system was designed to be intuitive and reduce the risk of incorrect connections that could damage vehicles or cause injury.
|
Cable Color |
Terminal |
Symbol |
Function |
|
Red |
Positive |
+ (Plus) |
Delivers power from the battery to the vehicle's electrical system |
|
Black |
Negative |
- (Minus) |
Completes the circuit by connecting to the vehicle's chassis (ground) |
The red color for positive terminals serves as a warning. Since the positive terminal carries voltage that can cause sparks or shorts when contacting metal parts, the red color signals caution. The black negative cable typically connects to the vehicle's chassis, creating a ground connection that completes the electrical circuit.
This color convention extends beyond just car batteries—it's consistent across most DC electrical systems, including jump starters, battery chargers, and other automotive electrical components.
Need Help With Your Car Battery?
Don't risk damaging your vehicle's electrical system. Our certified technicians can safely handle all your battery needs.
How to Visually Identify Positive and Negative Battery Terminals
Battery terminals with clear markings showing positive (+) and negative (-) indicators
While color-coding is the most obvious way to identify battery terminals, there are several other visual indicators you can use, especially when dealing with older batteries where colors might have faded or cables that may not follow the standard color convention.
Primary Identification Methods
1. Terminal Markings
Look for these symbols stamped directly on the battery:
- Positive terminal: Marked with "+" or "POS"
- Negative terminal: Marked with "-" or "NEG"
2. Terminal Size
On many batteries, the positive terminal is slightly larger in diameter than the negative terminal. This design prevents accidentally connecting cables to the wrong terminals.
3. Cable Thickness
The positive cable is typically thicker than the negative cable because it carries the main current load to the starter motor, which requires significant power during engine start.
4. Terminal Covers
Many vehicles have a plastic cover over the positive terminal as an additional safety measure to prevent accidental shorts.
When Visual Identification Is Difficult
If you're dealing with a battery where markings are unclear or cables don't follow standard colors, you can use a multimeter to verify polarity:
|
Test Type |
Positive Terminal Reading |
Negative Terminal Reading |
|
DC Voltage (Red lead to terminal, Black lead to ground) |
+12.6V (approximately) |
0V |
Using a multimeter to verify terminal polarity when visual identification is unclear
Safety Precautions When Handling Car Batteries
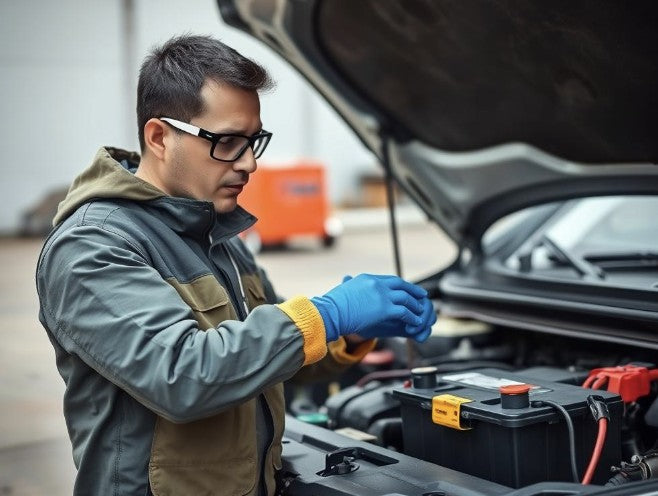
Always wear protective gear when handling car batteries
Car batteries contain sulfuric acid and can produce hydrogen gas, making them potentially dangerous if mishandled. Following proper safety protocols is essential whenever you're working with automotive batteries.
Essential Safety Equipment
- Safety glasses or face shield to protect eyes from acid splashes
- Insulated gloves to prevent electrical shocks
- No metal jewelry (rings, watches, bracelets) that could cause shorts
- Baking soda solution nearby to neutralize acid spills
Working Environment
- Well-ventilated area to disperse hydrogen gas
- No open flames or smoking near the battery
- Stable, level surface for battery placement
- Keep metal tools insulated when working near terminals
Important Safety Warning
Always disconnect the negative (black) terminal first when removing a battery, and connect it last when installing. This prevents sparks near the battery that could ignite hydrogen gas.
Proper Disconnection Sequence
- Turn off all vehicle electronics and the ignition
- Loosen and remove the negative (black) cable first
- Loosen and remove the positive (red) cable second
- When reinstalling, connect the positive (red) cable first
- Connect the negative (black) cable last
Proper sequence for disconnecting battery cables to ensure safety
Get the Right Tools for Battery Maintenance
Proper tools make battery maintenance safer and easier. Shop our selection of insulated wrenches, terminal cleaners, and safety equipment.
Consequences of Reversing Battery Connections
Electrical damage caused by reversed battery polarity connections
Connecting battery cables to the wrong terminals—known as reverse polarity—can have serious and expensive consequences for your vehicle. Modern cars have sophisticated electronics that are particularly vulnerable to electrical damage.
Potential Damage from Reversed Connections
- Blown fuses and damaged fusible links
- Fried electronic control modules (ECMs)
- Damaged alternator diodes
- Melted wiring harnesses
- Destroyed battery cells
- Computer system failure
- Airbag system damage
- Potential fire hazard
What Happens Electrically
When you reverse the connections, you're essentially sending current backward through the electrical system. Instead of the normal +12V to ground flow, you create a -12V to ground situation. This reversal can exceed the voltage tolerance of electronic components designed to handle current in only one direction.
|
Component |
Normal Connection |
Reversed Connection |
|
Diodes |
Allow current flow in one direction |
Forced to conduct in reverse, causing failure |
|
Capacitors |
Charge with correct polarity |
Reverse charged, potentially exploding |
|
Integrated Circuits |
Operate within voltage parameters |
Receive negative voltage, causing burnout |
Financial Impact
Repairs from reversed battery connections can cost anywhere from several hundred to several thousand dollars, depending on the extent of the damage and the vehicle's complexity.
Professional diagnosis of electrical system damage from reversed polarity
Common Exceptions to Standard Color Rules
While the red-positive, black-negative convention is standard, there are several situations where you might encounter exceptions that could lead to confusion.
Some vehicles may have non-standard cable colors, requiring careful identification
When Standard Colors Don't Apply
Older Vehicles
Some vintage cars manufactured before color standardization may have different color schemes or even cables of the same color for both terminals.
Aftermarket Modifications
Custom installations or repairs might use non-standard colors if the original cables were replaced with whatever was available.
International Variations
Some European and Asian manufacturers occasionally use different color conventions, though most have adopted the red/black standard.
Heavy Equipment
Industrial and agricultural equipment sometimes use different color schemes for their electrical systems.
Troubleshooting Tips for Mixed or Aged Cables
3 Ways to Verify Terminal Polarity When Colors Are Unclear
- Use a multimeter: Set to DC voltage, place the red probe on one terminal and the black probe on the vehicle's metal frame. A positive reading indicates the positive terminal.
- Trace the cables: The positive cable typically connects to the starter solenoid, while the negative cable connects to the engine block or chassis.
- Look for terminal size differences: The positive terminal is usually slightly larger in diameter than the negative terminal.
Tracing cables to their connection points can help identify terminals when colors are non-standard
Real-Life Scenarios: Applying Your Knowledge
Jump-Starting a Dead Battery
When jump-starting a vehicle:
- Connect red clamp to dead battery's positive terminal
- Connect other red clamp to donor battery's positive terminal
- Connect black clamp to donor battery's negative terminal
- Connect other black clamp to unpainted metal on dead car's engine (not the negative terminal)
- Start donor vehicle, then attempt to start the dead vehicle
Installing a New Battery
When replacing your battery:
- Ensure the vehicle is off and all electronics are disabled
- Remove the negative (black) cable first
- Remove the positive (red) cable second
- Install the new battery in the correct orientation
- Connect the positive (red) cable first
- Connect the negative (black) cable last
Always test your battery connections with a multimeter after installation to verify proper voltage
Is Your Battery in Good Health?
Most battery failures happen without warning. Get your battery tested today to avoid unexpected breakdowns.
Key Takeaways: Red vs Black Battery Cables
Remember: Red is positive (+), Black is negative (-)
The red cable always connects to the positive terminal, and the black cable always connects to the negative terminal. When in doubt, verify with terminal markings or a multimeter test.
Understanding battery cable colors and proper connection techniques is fundamental knowledge for every vehicle owner. By following the standard color conventions and safety procedures outlined in this guide, you can confidently handle battery maintenance and emergency situations while avoiding potentially costly mistakes.
Remember that safety should always be your priority when working with car batteries. If you're ever unsure about battery connections or encounter a non-standard setup, don't hesitate to consult your vehicle's manual or seek professional assistance. A small precaution today can prevent significant problems tomorrow.
Leave a comment
This site is protected by hCaptcha and the hCaptcha Privacy Policy and Terms of Service apply.