From spilled juice and crushed crackers to diaper blowouts and car sickness, child car seats endure a lot. Regular cleaning isn't just about aesthetics—it's essential for hygiene and safety. However, improper cleaning methods can compromise your car seat's integrity and protective capabilities. This comprehensive guide will walk you through how to effectively clean and maintain your child's car seat while preserving its safety features.
Before You Start: Essential Preparation
Proper preparation is crucial before tackling your car seat cleaning project. Taking the right steps now will save you time and prevent potential damage to this critical safety equipment.
Consult Your Car Seat Manual First
Every car seat manufacturer has specific cleaning instructions for their products. These guidelines aren't suggestions—they're requirements to maintain the seat's safety certification. Before doing anything else, locate your car seat's instruction manual and carefully review the cleaning section.
Important Safety Note: If you can't find your physical manual, most manufacturers offer digital versions on their websites. Search for your specific model number to download the correct instructions.
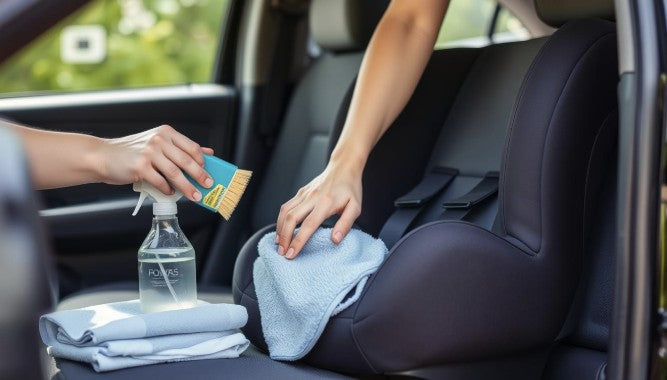
Gather Your Cleaning Supplies
Having the right tools ready will make the cleaning process much more efficient. Here's what you'll need:
- Mild, fragrance-free dish soap or baby shampoo
- Warm water
- Microfiber cloths or soft rags
- Soft-bristled brush (like an old toothbrush)
- Vacuum with crevice attachment
- Small bowl for soap solution
- Clean spray bottle with plain water
- Towels for drying
- Camera or phone (to document disassembly)
- Drying rack or clothesline
Document Before Disassembly
Before removing any parts from your car seat, take clear photos from multiple angles. This visual reference will be invaluable when it's time to reassemble everything correctly. Pay special attention to how the harness straps are routed and how the cover attaches.
Pro Tip: Take a short video as you remove each component. This moving visual guide can be more helpful than static photos when putting everything back together.
Step-by-Step Cleaning Process for Child Car Seats
Now that you're prepared, let's break down the cleaning process by component. Each part of the car seat requires specific care to maintain both cleanliness and safety.
Cleaning the Fabric Cover
The fabric cover is usually the most visibly soiled part of the car seat and fortunately, it's often the easiest to clean properly.
Remove the cover carefully. Follow your manual's instructions exactly. Most covers detach via snaps, hooks, or elastic edges, but the process varies by model.
Check the washing instructions. Most covers can be machine washed on a gentle cycle with mild detergent, but some require hand washing only.
Use cold water. Hot water can damage flame retardants and other safety features built into the fabric.
Air dry completely. Almost all car seat manufacturers prohibit machine drying as the heat can shrink or damage the fabric and safety features.
Never Use: Bleach, strong detergents, or fabric softeners on car seat covers. These chemicals can degrade the flame-retardant properties and weaken the fabric.
Cleaning the Harness Straps
The harness straps are critical safety components that require special care. Improper cleaning can weaken the fibers and compromise your child's safety in a crash.
- Check manufacturer instructions. Some allow spot cleaning only, while others permit wiping with a damp cloth.
- Spot clean with mild soap and water. Use a cloth dampened with a mild soap solution to gently wipe the straps.
- Focus on soiled areas. Pay special attention to areas with food, drink, or other spills.
- Wipe with clean water. Remove soap residue with a clean, damp cloth.
- Air dry completely. Allow straps to dry fully before reassembling the seat.
"Never submerge harness straps in water or put them in the washing machine. This can weaken the fibers that are designed to withstand crash forces."
- Car Seat Safety Technician recommendation
Cleaning Buckles and Metal Components
Buckles and other metal parts need to function perfectly for proper restraint. Food particles and sticky substances can interfere with proper latching.
- Check for debris. Examine buckles for crumbs or sticky residue that might affect function.
- Use plain warm water only. Most manufacturers specify that only water should be used on buckles—no soap.
- Swish gently in water. If allowed by the manufacturer, place the buckle (not the strap) in warm water and move it around to dislodge particles.
- Test buckle function. After cleaning, the buckle should click securely with an audible sound. If it doesn't, it may need replacement.
Never Use: Lubricants, WD-40, or oils on buckles or any car seat components. These can cause the mechanism to malfunction.
Cleaning the Plastic Shell and Base
The plastic components provide structural integrity to the car seat and need proper care to maintain their strength.
- Vacuum thoroughly. Use the crevice attachment to remove crumbs and debris from all joints and crevices.
- Wipe with mild soap solution. Use a cloth dampened with mild soap and water to clean all plastic surfaces.
- Pay attention to crevices. Use a soft brush (like a toothbrush) to clean tight spaces where food might be trapped.
- Rinse with clean water. Wipe with a clean, damp cloth to remove soap residue.
- Dry completely. Allow all components to air dry fully before reassembly.
- Stubborn Stains: For tough, dried-on messes, dampen the area with water and let it soak for a few minutes before gently scrubbing with a soft brush.
Proper Drying and Reassembly
The drying and reassembly process is just as important as the cleaning itself. Rushing this step can lead to mold growth or incorrect installation that compromises safety.
Drying All Components Thoroughly
Moisture trapped in car seat components can lead to mold growth or material degradation over time.
Air dry all components completely. Place items in a well-ventilated area away from direct sunlight.
Hang fabric covers to dry. Use a drying rack or clothesline to maintain the shape of the cover as it dries.
Allow ample drying time. Depending on humidity levels, components may need 24-48 hours to dry completely.
Check for hidden moisture. Before reassembly, verify that all parts, especially foam padding and crevices, are completely dry.
Careful Reassembly
Proper reassembly ensures that the car seat will function as designed in the event of a crash.
Refer to your documentation. Use the photos or video you took during disassembly as a guide.
Follow the manual exactly. Car seat assembly is precision engineering—each step matters for safety.
Check harness routing. Ensure straps lie flat without twists and are properly threaded through the correct slots.
Secure all attachments. Make sure all snaps, hooks, and fasteners are properly engaged.
Perform a safety check. Once reassembled, test all buckles, adjusters, and moving parts to ensure proper function.
Safety Critical: Improper reassembly can reduce the effectiveness of the car seat in a crash. If you're uncertain about any step, consult the manual or contact the manufacturer directly.
Need Help With Reassembly?
If you're struggling with proper reassembly, consider scheduling an appointment with a certified Child Passenger Safety Technician who can ensure your car seat is correctly installed.
Regular Maintenance Tips for Child Car Seats
Beyond deep cleaning, regular maintenance helps extend the life of your car seat and ensures it remains safe and functional.
Routine Inspection Schedule
Regular checks can catch small issues before they become safety concerns.
|
Frequency |
Maintenance Task |
What to Look For |
|
Weekly |
Quick visual inspection |
Food debris, visible stains, buckle function |
|
Monthly |
Thorough component check |
Strap wear, buckle function, cover attachment |
|
Quarterly |
Deep cleaning |
All components cleaned according to manufacturer guidelines |
|
After spills/accidents |
Immediate spot cleaning |
Address spills before they set in or attract pests |
|
Annually |
Comprehensive safety check |
Expiration date, recall notices, structural integrity |
Signs of Wear That Require Attention
Some wear and tear indicates that components may need replacement or that the entire seat should be retired.
Harness System
- Frayed or worn straps
- Loose stitching at stress points
- Difficulty adjusting harness tension
- Buckles that don't click securely
- Chest clip that slides too easily
Structural Components
- Cracks in the plastic shell
- Broken or missing pieces
- Loose or wobbly components
- Exposed metal or sharp edges
- Excessive play in recline mechanisms
Preventative Measures
Taking proactive steps can reduce the frequency and intensity of cleaning needed.
- Use seat protectors under the car seat to prevent damage to your vehicle upholstery.
- Consider washable covers that can be easily removed and cleaned.
- Use snack containers designed to minimize spills during car rides.
- Keep cleaning wipes in your car for immediate spot treatment of spills.
- Use bibs over the harness for children prone to spitting up or messy eating.
- Implement a "no food in the car seat" rule when possible.
Have a car sickness kit ready if your child is prone to motion sickness.
Store the seat properly when not in use to prevent dust accumulation.
Recommended Maintenance Products
These gentle, effective products are designed specifically for car seat maintenance and won't compromise safety features.
Common Mistakes to Avoid When Cleaning Car Seats
Even with the best intentions, these common cleaning mistakes can compromise your child's safety. Being aware of them helps ensure you maintain your car seat properly.
What NOT To Do
Using harsh chemicals like bleach, strong detergents, or stain removers that can degrade materials.
Submerging harness straps in water, which can weaken the fibers designed to withstand crash forces.
Machine drying any components, as heat can shrink fabrics and damage flame retardants.
Using lubricants on buckles or other moving parts, which can cause malfunctions.
Pressure washing or using excessive water that could penetrate and damage internal components.
Ignoring manufacturer's instructions in favor of "quick fix" cleaning methods found online.
Reassembling while components are still damp, which can lead to mold growth.
Using abrasive scrubbers that can damage fabrics and plastic surfaces.
What TO Do Instead
Use mild, fragrance-free soap specifically approved for car seat cleaning.
Spot clean harness straps with a damp cloth according to manufacturer guidelines.
Air dry all components completely in a well-ventilated area.
Clean buckles with plain water only, gently agitating to remove debris.
Use soft cloths and brushes for gentle cleaning of all surfaces.
Follow your specific car seat manual for all cleaning procedures.
Allow ample drying time before reassembling the car seat.
Test all mechanisms after cleaning to ensure proper function.
When in Doubt, Contact the Manufacturer: If you're unsure about any cleaning method, reach out to your car seat manufacturer's customer service. They can provide model-specific guidance that ensures both cleanliness and safety.
When to Replace Parts or the Entire Car Seat
Sometimes cleaning isn't enough, and components need replacement. Understanding when to replace parts or the entire seat is crucial for maintaining safety.
Parts That May Need Replacement
Harness straps that show fraying, stretching, or have been submerged in water
Buckles that don't latch securely or make a clicking sound
Chest clips that are cracked or don't secure properly
Padding that has lost its shape or cushioning properties
Covers that are torn or have compromised elastic
"Only use replacement parts that are specifically designed for your car seat model and approved by the manufacturer. Aftermarket or universal parts may not provide the same level of safety in a crash."
When to Replace the Entire Car Seat
After involvement in a moderate to severe crash (check manufacturer guidelines)
When the seat has reached its expiration date (typically 6-10 years from manufacture)
If there are cracks or damage to the plastic shell
When critical parts are broken and replacements aren't available
If the seat has been recalled and the issue cannot be remedied
Need Replacement Parts?
Contact your car seat manufacturer directly to order genuine replacement parts that maintain the safety integrity of your child's car seat.
Conclusion: Balancing Cleanliness and Safety
Properly cleaning and maintaining your child's car seat is a balancing act between keeping it hygienic and preserving its safety features. By following manufacturer guidelines and the steps outlined in this guide, you can ensure your child's car seat remains both clean and safe throughout its usable life.
Remember that a well-maintained car seat isn't just more pleasant for your child—it's a critical safety device that performs best when properly cared for. Regular cleaning, careful inspection, and prompt attention to wear and damage will help protect your most precious cargo on every journey.
Final Reminder: Always prioritize safety over convenience when cleaning your child's car seat. If you're ever unsure about a cleaning method, consult your manual or contact the manufacturer directly.
Stay Updated on Car Seat Safety
For the latest information on car seat safety, recalls, and best practices, register your car seat with the manufacturer and check for updates regularly.


Leave a comment
This site is protected by hCaptcha and the hCaptcha Privacy Policy and Terms of Service apply.