Installing a car seat correctly is one of the most important things you can do to protect your child. Studies show that 59-96% of car seats are installed incorrectly, which can significantly reduce their effectiveness in a crash. This comprehensive guide will walk you through the proper installation process step-by-step, helping you avoid common mistakes and ensure your child's safety on every journey.
Before You Begin: Essential Preparation
Before attempting to install your car seat, take these important preparatory steps to ensure success:
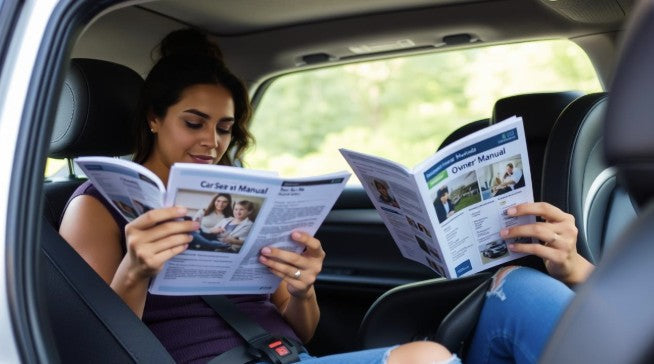
Read both manuals - Carefully review both your vehicle owner's manual and car seat instruction manual. These contain specific information about your particular car and seat combination.
Choose the safest location - The back seat is the safest place for children under 13. The center position of the back seat is typically safest (when compatible with your vehicle and car seat).
Understand your options - Know whether you'll be using the seat belt method or LATCH system for installation.
Remove loose objects - Clear the vehicle seat of any items that might interfere with a secure installation.
Check expiration date - Verify your car seat hasn't expired (typically 6-10 years from manufacture date).
Need Expert Help?
Not sure if you're installing your car seat correctly? Find a certified Child Passenger Safety Technician in your area who can help ensure your child's seat is properly installed.
Understanding Installation Methods: LATCH vs. Seat Belt
LATCH System
LATCH (Lower Anchors and Tethers for Children) was designed to make car seat installation easier. Most vehicles manufactured after 2002 have this system.
Look for metal anchors in the seat crease and tether anchors behind the seat
Connect the lower attachments to the vehicle's lower anchors
For forward-facing seats, always attach the top tether to the designated anchor point
Weight limits apply - Check your car seat manual for the maximum combined weight (child + car seat) for LATCH use, typically around 65 pounds
Seat Belt Method
The seat belt method is equally safe when done correctly and must be used when your child exceeds the LATCH weight limit.
Route the seat belt through the correct belt path (marked on your car seat)
Buckle the seat belt and remove slack
Lock the seat belt by pulling it all the way out and then letting it retract
Some car seats have built-in lock-offs that secure the belt
Works for all weight ranges when installed correctly
Both LATCH and seat belt methods are equally safe when installed correctly. Never use both methods simultaneously unless specifically allowed by your car seat manufacturer.
Installing a Rear-Facing Car Seat
Step 1: Position and Angle
Rear-facing car seats must be installed at the correct angle to protect your baby's airway and provide optimal protection.
Place the car seat in the rear-facing position on the vehicle seat
Check the car seat's angle indicator (bubble level, line indicator, or recline indicator)
Adjust the recline as needed - newborns typically need more recline than older infants
If needed, use a tightly rolled towel or pool noodle under the front edge of the car seat to achieve the correct angle
Step 2: Secure the Base (LATCH Method)
Locate the LATCH anchors in your vehicle seat crease
Attach the lower LATCH connectors to the anchors (listen for clicks)
Press down firmly on the car seat base while tightening the LATCH strap
Check for movement - the base should move less than 1 inch side-to-side and front-to-back when pulled at the belt path
Step 3: Secure the Base (Seat Belt Method)
Thread the seat belt through the rear-facing belt path
Buckle the seat belt and remove all slack
Lock the seat belt (pull all the way out and let it retract, or use the car seat's built-in lock-off)
Press down firmly on the car seat base while tightening
Check for movement - less than 1 inch at the belt path
Pro Tip: For leather seats that make installation challenging, a non-slip mat designed for car seats can help create more friction without compromising safety. Never use aftermarket products unless approved by your car seat manufacturer.
Installing a Forward-Facing Car Seat
Step 1: Position the Seat
Place the car seat in the forward-facing position on the vehicle seat
Adjust the recline angle according to your car seat manual (many forward-facing seats have multiple allowed positions)
Make sure the car seat sits flat against the vehicle seat back
Step 2: Secure the Seat (LATCH Method)
Locate the LATCH anchors in your vehicle seat crease
Attach the lower LATCH connectors to the anchors (listen for clicks)
Locate the top tether anchor in your vehicle (often on the back of the seat, ceiling, or floor)
Connect the top tether strap to the anchor point
Press down firmly on the car seat while tightening the lower LATCH straps
Tighten the top tether strap
Check for movement - less than 1 inch at the belt path
Step 3: Secure the Seat (Seat Belt Method)
Thread the seat belt through the forward-facing belt path
Buckle the seat belt and remove all slack
Lock the seat belt (pull all the way out and let it retract, or use the car seat's built-in lock-off)
Connect the top tether strap to the anchor point (always use the top tether for forward-facing seats)
Press down firmly on the car seat while tightening the seat belt
Tighten the top tether strap
Check for movement - less than 1 inch at the belt path
Always use the top tether for forward-facing car seats, regardless of whether you use LATCH or seat belt installation. The top tether reduces forward head movement by 4-8 inches in a crash, significantly reducing the risk of injury.
Get Your Free Installation Checklist
Download our comprehensive car seat installation checklist to ensure you haven't missed any critical steps in the installation process.
Common Installation Mistakes to Avoid
Correct Installation
Car seat moves less than 1 inch at the belt path
Harness straps at or below shoulders (rear-facing)
Harness straps at or above shoulders (forward-facing)
Chest clip at armpit level
Cannot pinch harness webbing at shoulders
Correct recline angle for child's age
Top tether used for all forward-facing installations
Common Mistakes
Loose installation (more than 1 inch movement)
Harness too loose or positioned incorrectly
Chest clip too low or too high
Using LATCH beyond weight limits
Not using the top tether for forward-facing seats
Incorrect recline angle
Adding non-approved accessories to the car seat
The Inch Test
After installing your car seat, perform the "inch test" to verify it's secure:
Grasp the car seat at the belt path (where the seat belt or LATCH strap passes through)
Try to move the seat side-to-side and front-to-back
The seat should not move more than 1 inch in any direction
If there's more movement, reinstall the seat, applying more pressure while tightening
NHTSA Guidelines: The National Highway Traffic Safety Administration (NHTSA) recommends having your car seat installation checked by a certified Child Passenger Safety Technician. Many local fire stations, police departments, and hospitals offer free car seat checks.
Pro Tips for Special Installation Situations
Challenging Vehicle Seats
Leather seats: If your car seat slides on leather upholstery, check if your car seat manufacturer approves the use of a non-slip mat
Contoured seats: Fill gaps with tightly rolled towels alongside the car seat (not underneath unless adjusting angle)
Shallow seat depth: Check if your car seat allows for 80% of its base to be supported by the vehicle seat
Multiple Car Seats
Try different combinations of car seats - some are designed to fit 3-across
Consider narrower car seats if installing multiple seats
Alternate rear and forward-facing positions when possible
Check that each seat can be installed independently without loosening others
Warning: Never modify your car seat or use aftermarket products not approved by the manufacturer. This includes seat protectors, head supports, and strap covers not included with the original car seat.
Final Safety Checks
Before placing your child in the newly installed car seat, perform these final safety checks:
Stability check: Verify the car seat moves less than 1 inch at the belt path
Harness check: Ensure harness slots are at the correct height for your child (at or below shoulders for rear-facing, at or above shoulders for forward-facing)
Recline check: Confirm the car seat is at the proper angle according to the indicator
Tether check: For forward-facing seats, verify the top tether is connected and tight
Lock check: Ensure the seat belt or LATCH strap is properly locked
Pinch test: After buckling your child, pinch the harness at the shoulder - if you can pinch excess webbing, tighten the harness
Chest clip position: Position the chest clip at armpit level
Know Your State's Car Seat Laws
Car seat laws vary by state. Make sure you're compliant with your state's specific requirements for child passenger safety.
Ensuring Your Child's Safety on Every Journey
Properly installing your car seat is one of the most important steps you can take to protect your child while traveling. Remember that installation techniques may vary slightly depending on your specific car seat model and vehicle, so always refer to both manuals for the most accurate guidance.
Even if you're confident in your installation, consider having it checked by a certified Child Passenger Safety Technician. Many parents are surprised to learn they've missed important steps, even after carefully following instructions. Regular checks are also important as your child grows and if you move the seat to a different vehicle.
By following this guide and taking advantage of professional resources, you can have peace of mind knowing you've done everything possible to keep your child safe on the road.
Need Professional Installation Help?
Find a certified Child Passenger Safety Technician near you for a complete car seat check and installation assistance.

Leave a comment
This site is protected by hCaptcha and the hCaptcha Privacy Policy and Terms of Service apply.